Share this
How to do a Bare Metal Restore after a Hard Drive Failure
by Bridget.Giacinto on Sep 30, 2014 2:15:00 PM
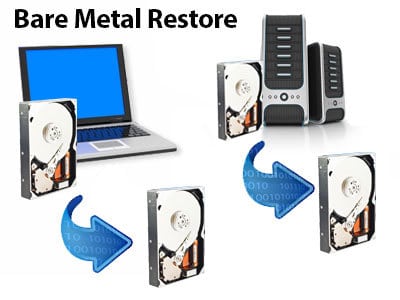
The reality is, that hard drives fail and if you do not perform a backup of your hard drive, you could lose your data. A bare metal restore will allow you to restore your hard drive data to a "bare-metal" system, which does not have any software or operating system installed on it. This post will cover how to do a bare metal restore using a bootable NovaBACKUP recovery CD after a hard drive failure.
To learn more about bare metal restore, view our post on Bare Metal Restore: How & When to Use It.
In order to restore a NovaBACKUP image backup in a bare metal restore scenario, you first need to create a bootable Disaster Recovery CD or thumb drive, which includes a small operating system and software designed to access your backup image.
To perform a bare metal restore of your image backup, you would need to use the bootable Disaster Recovery CD (or thumb drive) that you created in the main NovaBACKUP software to start up your computer. This bootable media will allow you to restore the image backup to a replacement hard drive; for the purpose of this article.
NOTE: Even with a “new” or “replacement” hard drive it is important to test the destination hard drive thoroughly before utilizing it to restore to in a Disaster Recovery bare metal restore operation. There are various tools designed to test your hard drive including the hard drive manufacturer’s own diagnostic tool.

How to do a Bare Metal Restore Using NovaBACKUP to Recover Your Files
Click on the “Restore” function (available within the bootable CD you created) from the menu of items available and select the location of the image backup file. By default, the restore function will only show the files that match the file extension (.NDF), so it should be easy to locate the image file to restore. The image backup file could be stored on a variety of media, including a locally connected external USB hard drive or network path such as a NAS or network share when you go to browse to it.
Once you select the image backup file to restore, you can select which items inside the image backup to restore. You will probably want to restore the entire disk in the image backup, but you can also select only the partitions you want from a disk stored in that image to restore. On the same screen, you will be asked if you are performing a “Machine independent restore” or “Restore to a VHD file,” but these options are not selected by default.
If you are restoring the backup image to the same model of computer that you originally created the image backup on, then you can continue without utilizing either of those options. For information on those two options you can read the following NovaBACKUP online help article.
NOTE: The “Machine independent restore” option would be utilized if you are restoring this image backup to a different model of computer, which contains a different model of motherboard or storage adapter for instance than the original computer that you imaged contained.
The “Restore to a VHD file” option would be if you want to create an output file instead of restoring to another physical disk. The output file is created using the specified name and location and converted to a Microsoft mountable VHD format.
Select the Restore Destination
After you select the portion of the image to restore, you will choose the destination location to restore that image to, normally that would be to a replacement internal hard drive.
NOTE: The destination hard drive would have to be the same size or larger than the source hard drive that the image backup was originally created on. That is key because the first item that will be performed during the restoration of an image backup to the destination hard drive will be that the partition table (structure of the hard disk) will be re-created exactly as it was stored in the image backup. It will then restore the contents stored in the image backup sector by sector to the destination hard drive.
Once the restore process is started, there will be a status screen that shows various statistics including a progress bar, the percentage completed, and the elapsed time.

After the restore has completed you can remove the Disaster Recovery bootable CD or thumb drive media and restart the computer and your Windows operating system will load and the state of Windows be exactly as it was stored in the Disaster Recovery image backup at the time of creating the image backup.
You can now store that bootable CD or thumb drive media in a safe place, possibly even keep another copy of that media offsite away from your business. You could even store the Disaster Recovery image backup (.NDF) file on a completely separate media such as another hard drive that you use for offsite storage so that it is not accidentally overwritten or deleted inadvertently. This way you can utilize it in the future, should you ever need to restore the image backup again.
Further reading How MSPs and SMBs Ensure Fast and Reliable Recovery After Data Loss
Should you need additional assistance, feel free to reach out to one of our backup and disaster recovery experts.
Share this
- Pre-Sales Questions (91)
- Tips and Tricks (90)
- Best Practices (37)
- Industry News (37)
- Reseller / MSP (31)
- Security Threats / Ransomware (26)
- Disaster Recovery (24)
- Cloud Backup (22)
- Storage Technology (22)
- Compliance / HIPAA (20)
- Applications (18)
- Backup Videos (15)
- Virtual Environments (12)
- Technology Updates / Releases (7)
- Backup preparation (6)
- Infographics (5)
- Products (US) (4)
- Company (US) (1)
- Events (1)
- Events (US) (1)
- Unternehmen (1)
- January 2026 (2)
- December 2025 (2)
- November 2025 (1)
- October 2025 (2)
- September 2025 (1)
- August 2025 (1)
- July 2025 (1)
- June 2025 (2)
- May 2025 (2)
- April 2025 (2)
- March 2025 (1)
- February 2025 (2)
- January 2025 (2)
- December 2024 (1)
- November 2024 (2)
- October 2024 (1)
- September 2024 (2)
- August 2024 (1)
- July 2024 (2)
- June 2024 (3)
- May 2024 (1)
- April 2024 (2)
- March 2024 (3)
- February 2024 (2)
- January 2024 (1)
- December 2023 (1)
- November 2023 (1)
- October 2023 (1)
- September 2023 (1)
- August 2023 (1)
- July 2023 (1)
- May 2023 (1)
- March 2023 (3)
- February 2023 (2)
- January 2023 (1)
- December 2022 (1)
- November 2022 (2)
- October 2022 (2)
- September 2022 (1)
- July 2022 (1)
- June 2022 (1)
- April 2022 (1)
- March 2022 (2)
- February 2022 (1)
- January 2022 (1)
- December 2021 (1)
- September 2021 (1)
- August 2021 (1)
- July 2021 (1)
- June 2021 (1)
- May 2021 (2)
- April 2021 (1)
- March 2021 (1)
- February 2021 (1)
- January 2021 (1)
- December 2020 (1)
- November 2020 (1)
- October 2020 (1)
- September 2020 (3)
- August 2020 (2)
- July 2020 (1)
- June 2020 (1)
- May 2020 (1)
- April 2020 (1)
- March 2020 (2)
- February 2020 (2)
- January 2020 (2)
- December 2019 (1)
- November 2019 (1)
- October 2019 (1)
- August 2019 (1)
- July 2019 (1)
- June 2019 (1)
- April 2019 (1)
- January 2019 (1)
- September 2018 (1)
- August 2018 (3)
- July 2018 (2)
- June 2018 (2)
- April 2018 (2)
- March 2018 (1)
- February 2018 (1)
- January 2018 (2)
- December 2017 (1)
- September 2017 (1)
- May 2017 (2)
- April 2017 (4)
- March 2017 (4)
- February 2017 (1)
- January 2017 (1)
- December 2016 (1)
- October 2016 (2)
- August 2016 (3)
- July 2016 (1)
- June 2016 (2)
- May 2016 (6)
- April 2016 (5)
- February 2016 (1)
- January 2016 (7)
- December 2015 (6)
- November 2015 (2)
- October 2015 (5)
- September 2015 (1)
- July 2015 (1)
- June 2015 (2)
- May 2015 (1)
- April 2015 (3)
- March 2015 (3)
- February 2015 (3)
- October 2014 (2)
- September 2014 (6)
- August 2014 (4)
- July 2014 (4)
- June 2014 (3)
- May 2014 (2)
- April 2014 (3)
- March 2014 (4)
- February 2014 (5)
- January 2014 (5)
- December 2013 (4)
- October 2013 (6)
- September 2013 (1)


