Share this
by Bridget.Giacinto on Jul 13, 2015, 4:35:42 PM
Disaster recovery planning should be a part of your overall backup plan. You don't want to be kicking yourself for waiting until after your hard drive crashes or some other disaster strikes to finally learn how to create a backup of your entire system. Instead of taking days to manually reinstall everything, you can simply use an image backup to quickly restore the entire system including your operating system and all of your applications (in addition to your files). To do so, you will need to know how to create a disaster recovery image backup and a boot disk, which will allow you to recover your entire system to your new computer should you ever need to.
Top 4 reasons to restore your entire system using a disaster recovery image backup:
- Windows corruption
- Pending hard drive failure (watch for the signs)
- Virus
- Computer will not boot up
The first step in preparing for disaster recovery is to create a boot disk. A boot disk is a removable media device (CD, DVD, USB flash drive, or USB hard drive) that contains Windows startup files that will allow your computer to boot up using a minimal Windows operating system or a utility program, should your hard drive or the Windows system files of your hard drive become damaged or unusable.
Create a Disaster Recovery Disk
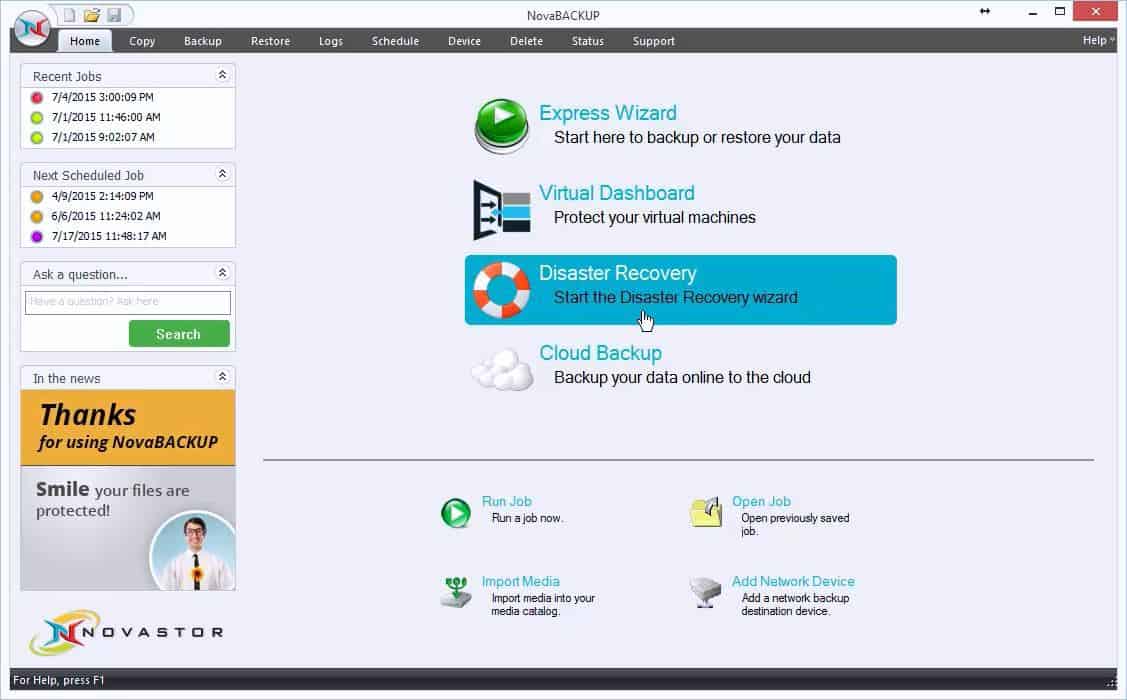
To create a disaster recovery boot CD or recovery disk within NovaBACKUP simply launch NovaBACKUP and click on Disaster Recovery.
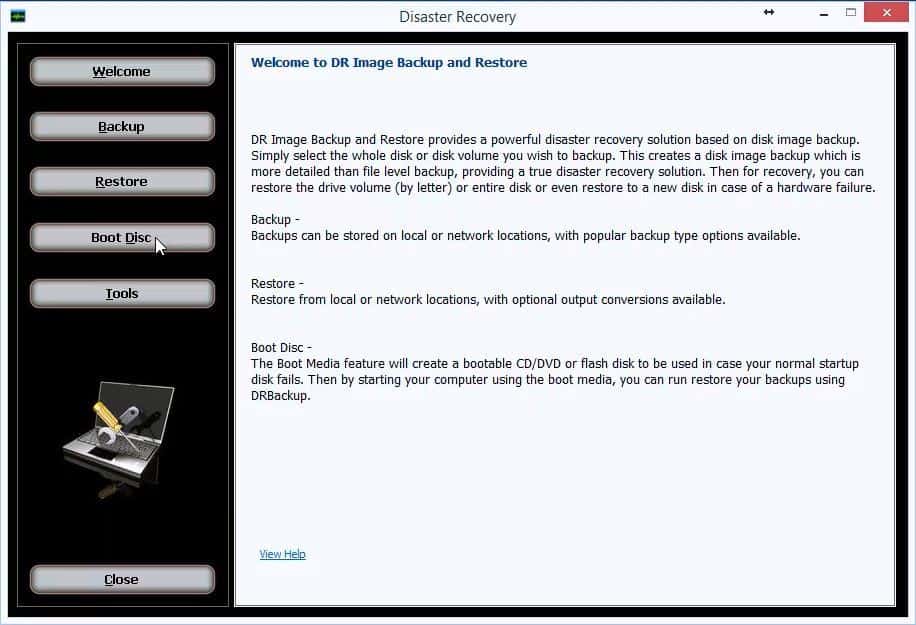
Next, make sure that Launch Disaster Recovery Tool for Backup/Restore/Boot CD Creation is selected and then click Next. When the DR Image Backup and Restore screen launches, select Boot Disc. A Boot disc and recovery disk are interchangeable names for the same thing.
Under the Boot Media Type drop-down, select Advanced and then click Next.
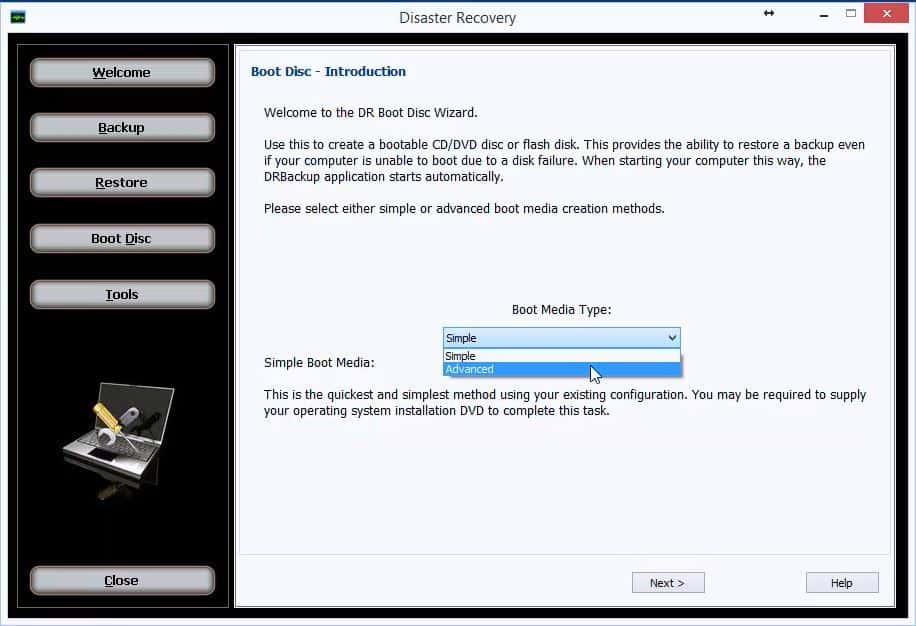
The Advanced Boot Media option uses the Windows Assessment and Deployment Kit (ADK) from Microsoft to create a PE Windows boot disc with custom drivers. Windows PE is a Preinstallation Environment for Windows that contains a mini Win32 operating system. This minimal operating system is Microsoft’s primary tool for allowing users to boot up their computers without a functional operating system. This will also allow an image backup which contains a functioning OS to be used for recovery.
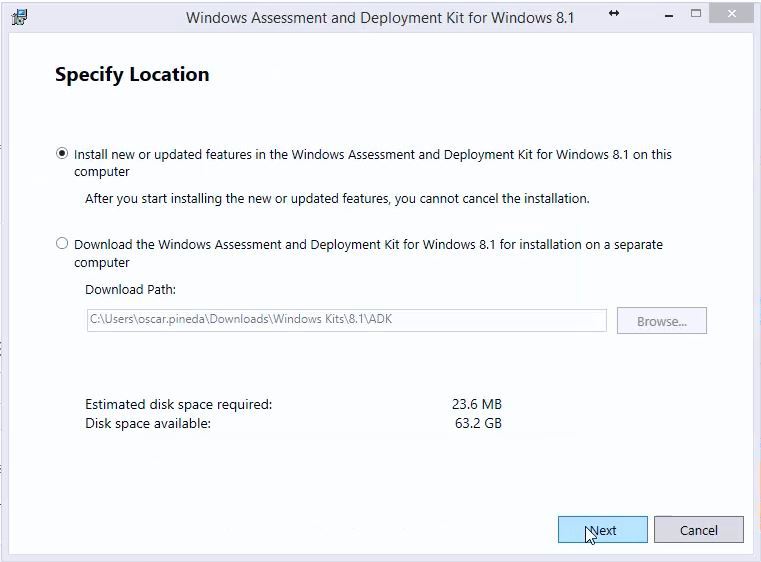
This process requires that you download and install files from the Microsoft website prior to creating a boot disc. To launch the Microsoft download center, simply click the button that says Go to Download Site. An internet browser will launch the website and provide a link to download Windows ADK. Select your preferred language and then click Download. You will want to save and then run this kit application.
Leave all of the default selections under Specify Location and then click Next.
Make sure that you accept the license agreement by selecting Accept on the next screen.
You will need to select the features you want to install. You will only need to check Deployment Tools and the Windows Preinstallation Environment (Windows PE) and then click Install. Once it has completed, click Close and then close the browser.
Go back to NovaBACKUP and click Next. Since the Assessment and Deployment Kit is now installed, you can go to the installed location. Just click Search and navigate to the location of the folder specified under Installed Location (example highlighted below).

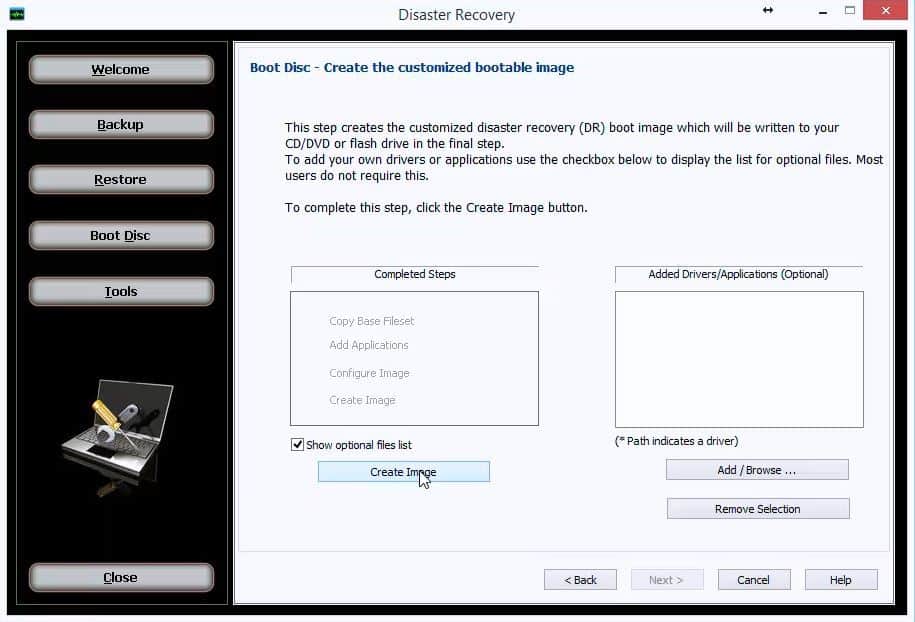
Now you are ready to create the customized bootable image. If you want to add your own drivers for RAID controllers or hard drive controllers you can do so by clicking the box to “show optional files list.” Most users will not need to add additional drivers. Next, click the Create Image button. Once it is complete, click Next.
Select the removable media device you would like to write the boot disk to. If you have not yet plugged in your removable media device, do so now. You will need to click the Refresh button if you do not see your device listed. Click Finish to write your boot disc.
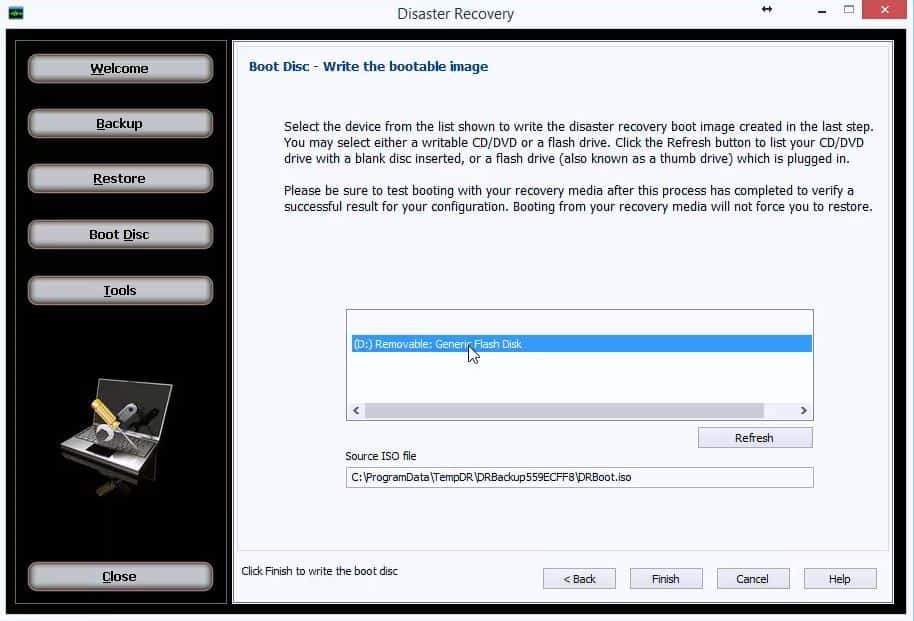
Once the boot disc says that the process is completed, click Done.
Create a Disaster Recovery Image Backup
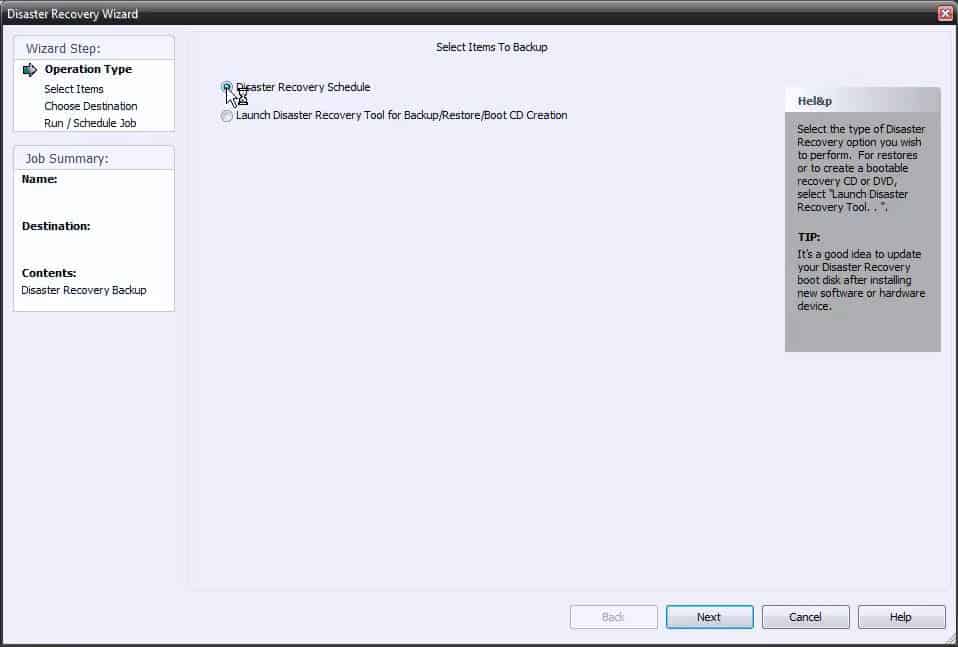
Now you are ready to run the Disaster Recovery schedule to create your image backup. Click Disaster Recovery Schedule and click Next.
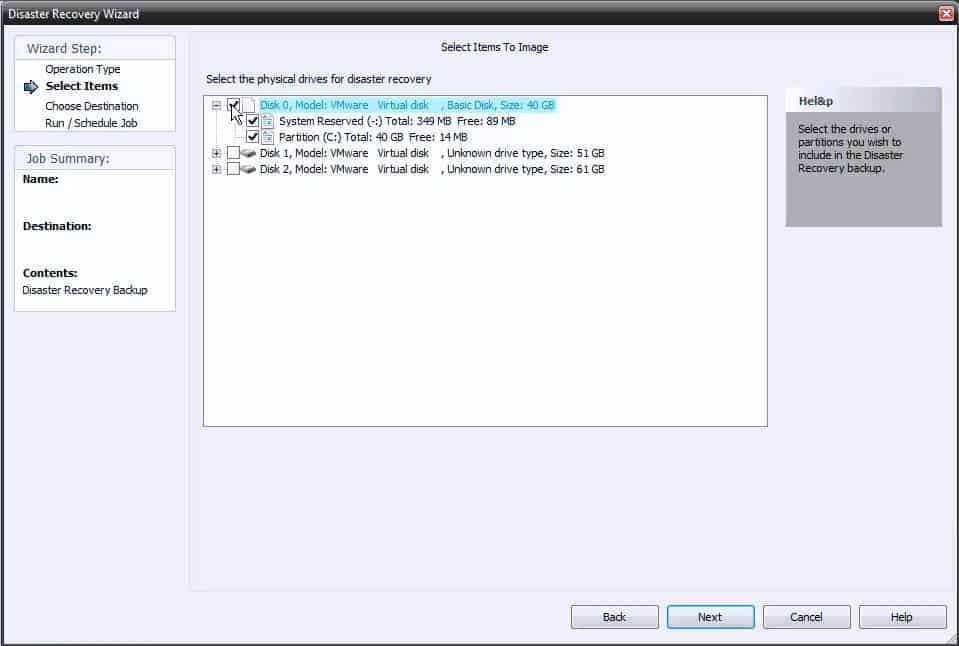
Select the physical drives that you would like to image for disaster recovery. We recommend that you select a disk that has the boot partition.
The Disaster Recovery Wizard will walk you through the remaining steps, but they are also outlined below.
The next step is to name your backup and select the backup destination. We would recommend using a removable drive or a network drive for your Disaster Recovery (DR) image backup.
Since DR images have a tendency to be large in size, you will want to make sure that the device you select has adequate storage space. If you are concerned about the storage space used by your image backups, you may want to consider checking the box to “Overwrite previous image backup.”
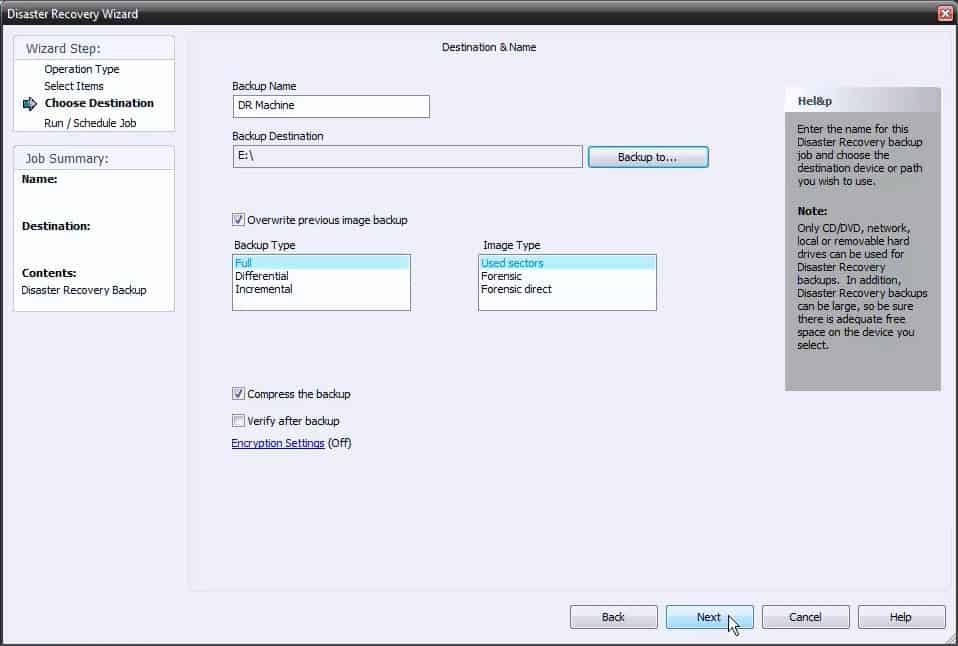
You will want to create a Full backup and in most cases, the image type should be Used sectors. You also have the option to compress the backup, verify the backup after it is complete, and set up the encryption settings to encrypt your image backup. Once you have made your selections click Next.
Next, you will select the type of schedule you want to set up for your image backup. You can choose One Time or create a schedule for your image backups. For many users, monthly or even quarterly image backups are adequate. Then you would just need to setup file backups to run in between your image backups.
Now you can select a Job Name for your image backup. Just click the down arrow to launch Windows Explorer, enter the File name, and click the Save button.
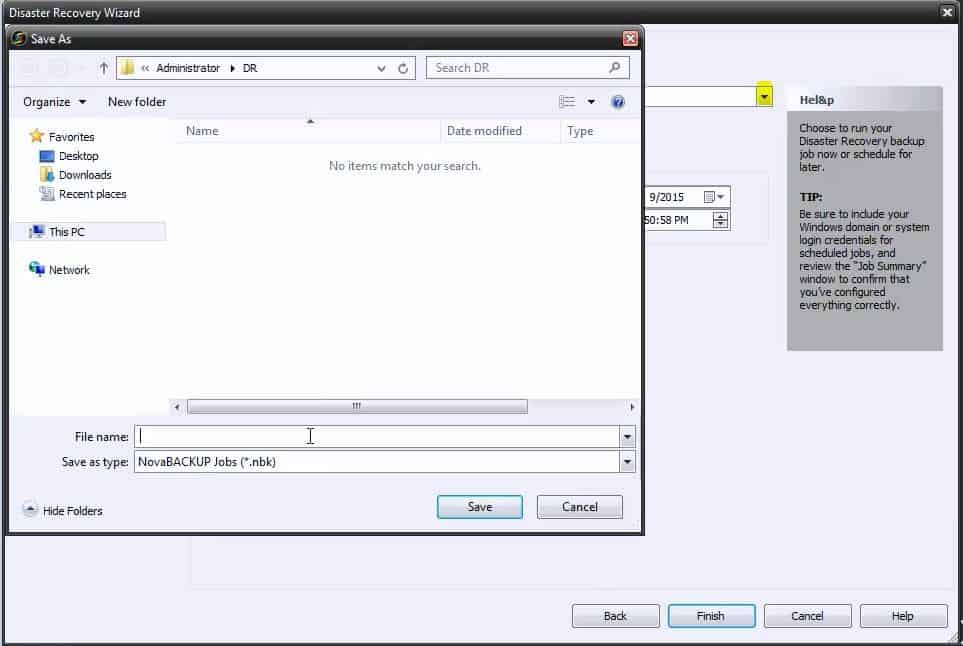
Unless you need specific admin login credentials, leave the job to Run as a logged-in user. On this screen you can also set the time and date when you want the image backup to run and then click Finish.
How to Recover Your Entire System in Case of a Hard Drive Crash
Now that you have learned how to create an image backup, you will need to know how to restore this image using the boot disk that you created in order to recover your entire system. For restore instructions, read our post on how to do a bare metal restore after a hard drive failure.
View our video tutorial to get a walkthrough of the entire disaster recovery image backup and restore process using NovaBACKUP backup software hard drive recovery software.
Share this
