Share this
by Oscar Pineda on Apr 7, 2015 8:43:09 AM

Now that you have virtualized your SQL Server using Hyper-V, you will need to make sure that you backup your SQL databases on your hypervisor.
With NovaBACKUP Business Essentials, you have two primary options for Hyper-V SQL server backups on virtual machines. The first is snapshot backups, the second option is to run a backup on the actual virtual machine itself. We'll go into more detail and the pros and cons of each option so you can decide what works best for your small business.
Option 1: Snapshot Backups
Option one takes a snapshot of your VM’s stored on your Hypervisor. No additional license is needed to backup the virtual machine that contains your SQL database. This method of backup can be used if you have a small database and your MS-SQL database is using the simple recovery mode. In this mode MS- SQL provides no transaction log recovery, and truncates the log at every transaction checkpoint.
As you contemplate which option is best for you, keep in mind that using the snapshot method requires a full backup of the whole VM every time. This option results in a longer backup as you are backing up the whole VM. It also increases your restore time because you are restoring the whole VM rather than just the database.
Option 2: Run Backup on VM
Option two, is the most efficient method of backing up a MS-SQL database. This option would be to run NovaBACKUP Business Essentials on the actual VM itself.
Running NovaBACKUP Business Essentials on the VM allows for the truncation of the transaction logs every time you back it up under the full or bulk-logged recovery model.
Running the NovaBACKUP MS-SQL plugin allows for shorter backup times, and smaller backups since you are not backing up the whole VM. Also, if you have multiple databases you can select which databases to restore, further decreasing your downtime.
How to Backup and Restore Your SQL Database:
Step 1: Create a Backup of Your SQL Server

Launch NovaBACKUP and click on the Backup tab. Select the Backup Source, found in the left column of the screen. Towards the bottom under Network you will see the “Microsoft SQL Server” plugin. For this example I will select all my databases. In the bottom left hand side of the screen, select Backup to. In this example, the backup device I am using is my “Backup NAS”, the name of my backup script and backup file is SQL Backup - WIN-2K12R2X64. Click Schedule.
Step 2: Schedule Your Backup
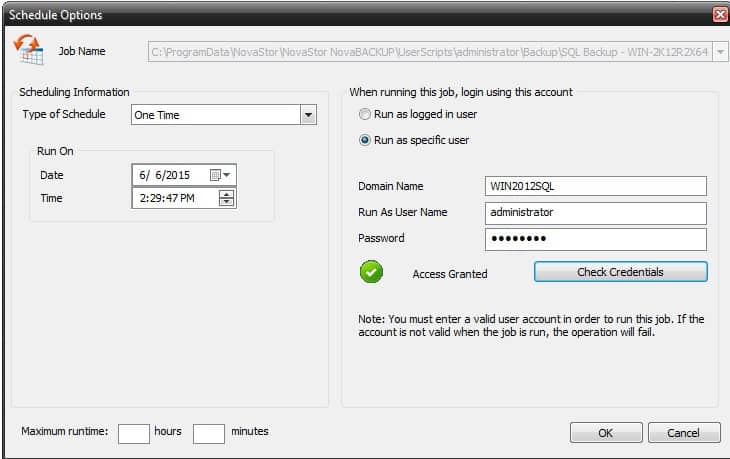
On the Schedule Options screen you have the option to choose the type of schedule and when you would like to schedule the backup. Setup and verify your credentials and click OK to save your backup schedule.
Step 3: View or Run Your Backup Now
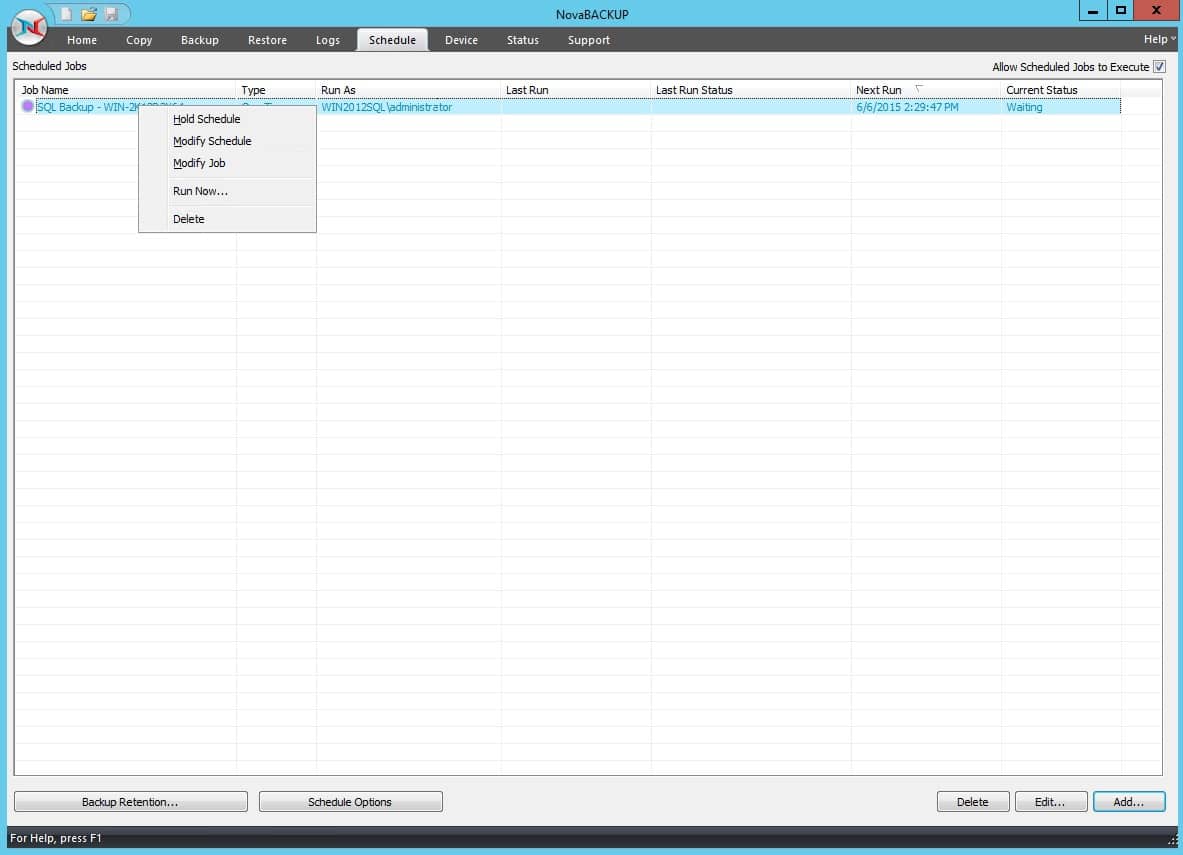
To view your scheduled SQL backup, just click on the Schedule tab and you will see the backup job you just scheduled. If you decide to run your back now, just right click on your SQL backup job and click Run Now.
Step 4: Restore Your SQL Backup

In order to restore your SQL backup, just click on the Restore tab and navigate down to the database you want to restore. For this example, I will be restoring the database "oscar's stuff." (As you can see in the SQL Server Management Studio the database is missing). Just click Restore to restore this database.
Step 5: Verify Your Restore is Complete
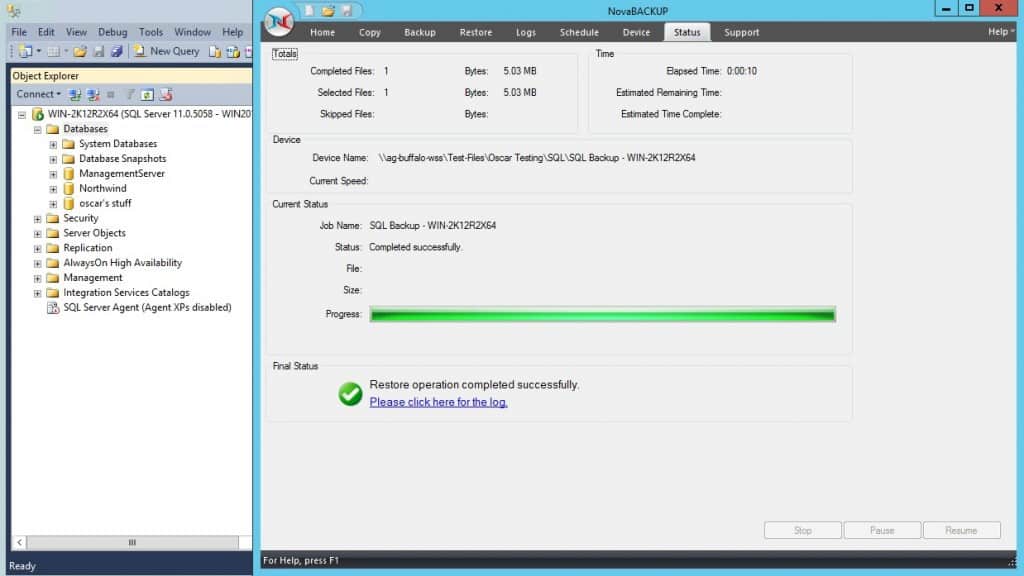
The Status tab will automatically come up, but you can click on this tab at any time to view the progress of your restore. You will see a final status notice indicating that your restore is complete. Once your restore is complete, you will see your database restored (look in the Management Studio) to the point when your backup ended.
That's it. Your done with your SQL database backup and restore using NovaBACKUP Business Essentials.
Share this
