To simplify the process of backing up to a local storage device, this device only needs to be set up once and can then be used for every backup job. This includes USD drives, RDX-drives, and NAS.
- Add a Backup Device
On the [Device] tab, click [Add] and then [Local Backup].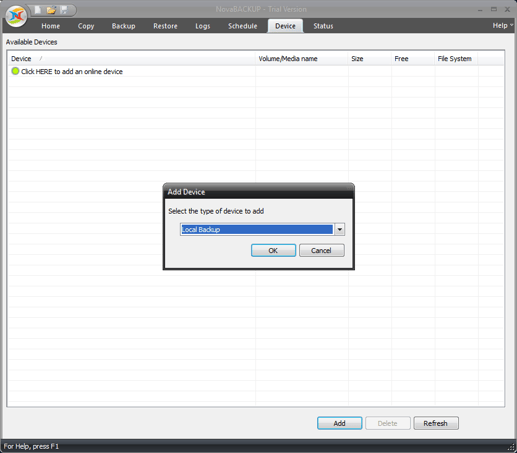
- Enter a Device Name & Network Path
Under "Local Backup" specify a device name. It is used to identify the device and is displayed in the device lists throughout the application.
If you're setting up a NAS or network storage, specify the network path (UNC) in the "Folder and Network Path" field. You can also use the browse button "..." to search for a particular network path.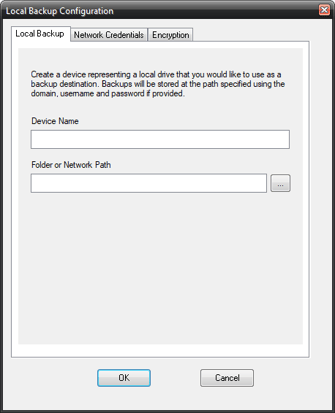
Note: In the field "Device Name" do not utilize these unsupported Windows file name characters: \ / : * ? “ < > | - For NAS or network storage: Enter Network Credentials
Click on the "Network Credentials" tab. Specify at least the "Username" and "User password" fields, and if the network share is on a domain, also specify the "Domain name" field.-1.png?width=335&height=414&name=NAS_add_4%20(no%20highlights)-1.png)
- Add Encryption
This is an optional step. If you'd like to encrypt your backup files, add an encryption key in the tab "Encryption". - Confirm with [OK].
A connection test will be performed automatically, and after a successful test , the device will be created.
If you get an error during the test, please confirm the network path and the network credentials. If you still have an issue please reference this guide here. - Once the device is added successfully, you'll find your newly created device in the [Device] tab.
Note: The device's network credentials can be edited at any later time. The "Device Name" and "Folder and Network path" field value properties cannot be changed after the device has already been created. To change these two properties, you would need to create a new "Local Backup" device.
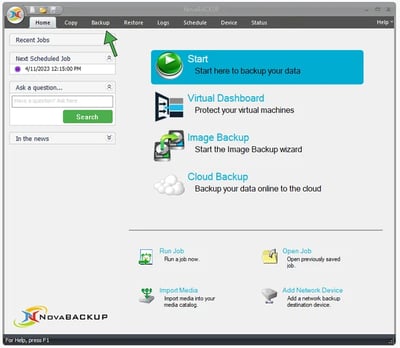
To create a backup job for your business-critical data such as files, folders, and Hyper-V VMs or MS SQL databases, click on the [Backup] tab in the top menu or click the [Start] button.
Start by:
- Defining a "Backup Name".
- Selecting the files and folders you want to back up, or - for NovaBACKUP Server Agent only - select the complete Hyper-V object and/or MS SQL Server object, or only individual VMs or databases if required.
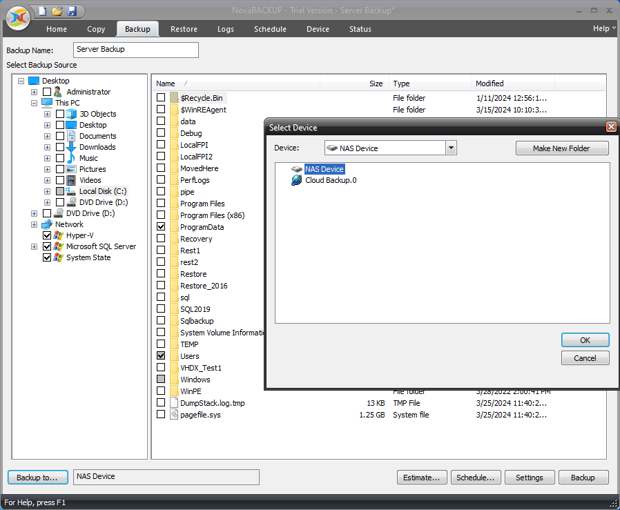
- For a backup going only to a local device or going only to cloud storage, click on [Backup to] in the lower left corner.
- Then select the appropriate local or cloud backup storage in the "Select Device" dialog (Note: to back up to the NovaBACKUP Cloud, select "Cloud Storage").
- Confirm with [OK].
- If you want to set up a hybrid backup (a backup that goes to a local device first and then to cloud), start by selecting the appropriate local backup storage in the [Backup to] dialog.
- Confirm with [OK].
- Click on “Settings”
- Select the checkbox “Enable Hybrid Backup” in the tab “Backup”.
- Select your cloud storage device (Note: to back up to the NovaBACKUP Cloud, select "Cloud Storage").
- Set the retention for your local backup job under “Device Retention” - “Maximum Backup Age”. And the retention for the backup sent to the cloud storage under “Enable Hybrid Backup” – “Maximum Cloud Backup Age”.

Save your backup job by clicking the save icon in the top left corner.![]()
Backup Job Settings
Continue by clicking [Settings] for more optional settings for your backup job.
- [Backup] Tab - Device Retention
For local-only, cloud-only, or the local part of hybrid backups, you can set the retention value (how long you want to keep your backups). The default value for each backup schedule is 30 days. - [Backup] Tab - Enable Hybrid Backup
By enabling the hybrid backup function, a cloud backup is added to any local backup. NovaBACKUP will then back up the selected files to the selected local storage first and from that local storage to the selected cloud storage afterwards. - [Backup] Tab - After backup action
What should NovaBACKUP do after the backup is completed? - [Notification] Tab
Set up e-mail notifications here. - [Filters] Tab
Backup jobs can include filters that allow you to select specific include and exclude filters based on file masks, such as exclude certain file types (*.bak *.tmp), include files with specific dates and file sizes, exclude files with specific attributes (read-only, hidden, or system), etc. - [Custom Commands] Tab
Store a pre-/post-script (batch), which is executed before or after the backup here.
Backup Schedule
If you only want to run a one-time backup, you can click on [Backup] to start your backup.
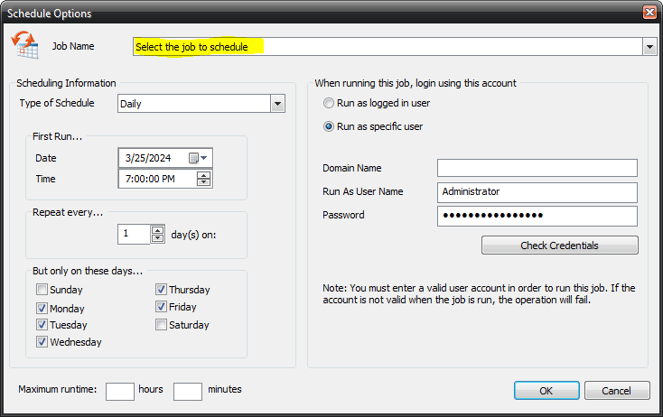
If you'd like to schedule a reoccurring backup, for example, once daily, instead continue by clicking [Schedule] and define the following:
- Your current backup job is selected under Job Name. If it's not selected, pick the job you want to schedule from the drop-down menu (see yellow highlighting below).
- Under "Scheduling Information", specify when and at what intervals the backup job should run.
- Enter the user who has access to the selected data to ensure that the backup works without errors even if you're logged out. Then click [Check Credentials].
- Click [OK] to confirm. You will find the backup job under "Schedule" at the top of the main navigation. The backup job can be adjusted at any time.
Your scheduled backup job is now set up and will start at the time you selected. If necessary, you can set up multiple backup jobs for different files, Hyper-V VMs, or SQL databases. Simply follow the steps above until you have set up all the backup jobs you need.
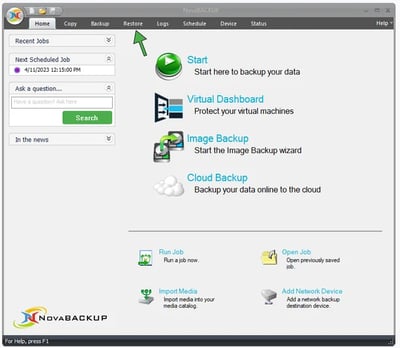
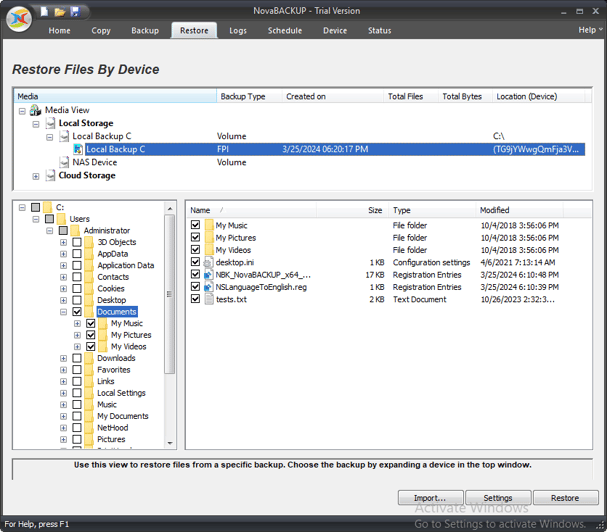
- To restore a file, folder, application, or Hyper-V virtual machine, click on the [Restore] tab.
- Select the backup you would like to restore from and the files you would like to restore.
- Click the [Settings] button to set up how you want to restore the file. You can choose to overwrite the existing file. You can also restore the files to the original location or restore the files to an alternate location.
Click the [OK] button to confirm your selections.
Note: By default, restores of file and plugin data will overwrite the existing files at their original location.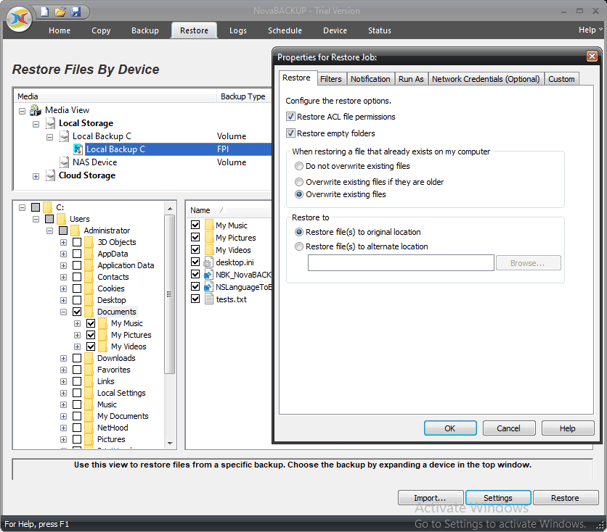
- Click the [Restore] button to start the restore.
- You will see the progress of your restore in the [Status] tab.
An image backup is used to back up the entire operating system, including system settings and all data and applications available on the system.
We recommend adding a weekly or monthly image backup to your backup strategy, depending on how often your system changes.
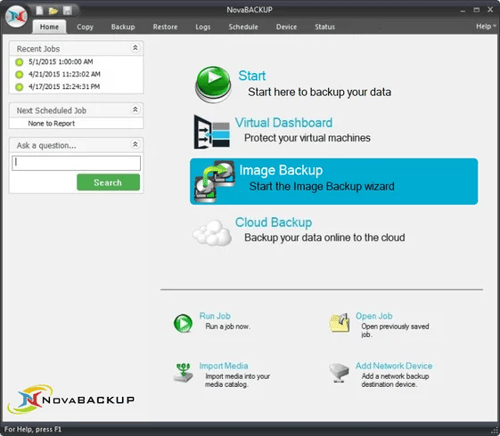
- From the Home tab, select [Image Backup].
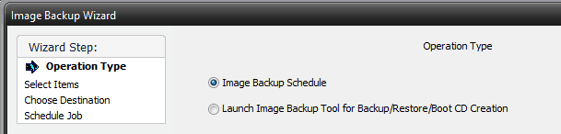
- Select [Image backup schedule].
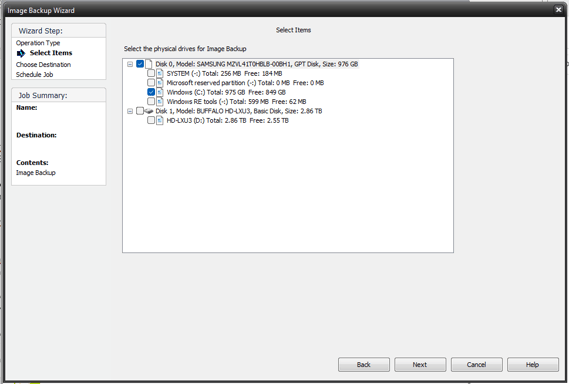
- Select the physical drives you would like to create an image of.
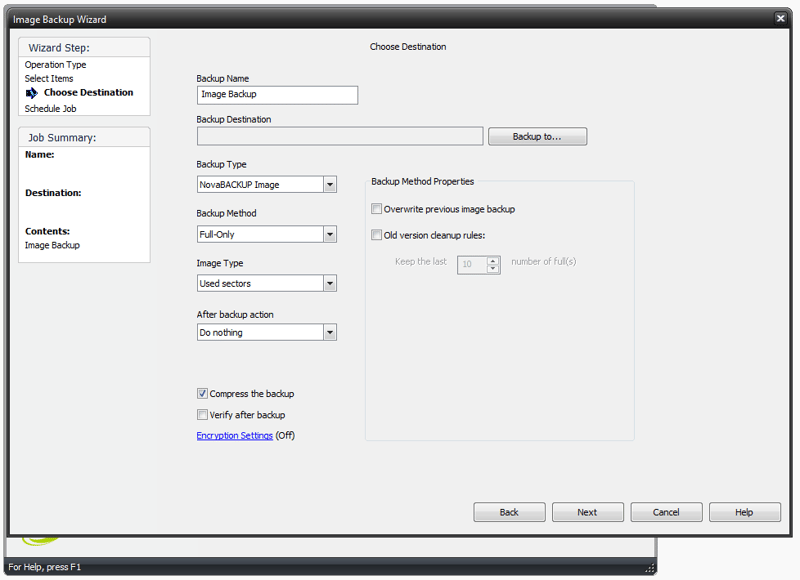
- Define a Backup Name. Then click [Backup to....] to select the backup destination. Then select the Backup Type, Backup Method, and Image Type you would like to use and confirm by clicking [Next].
- Backup Type
NovaBACKUP Image: Creates an Image Backup of your entire drive for disaster recovery.
VHD: Virtual Hard Disk is used to restore an image to a Hyper-V.
VHDx: Virtual Hard Disk is used for image restores to Hyper-V, VMware, and VirtualBox (for Windows Server 2012 and later versions).
Recommendation: If you are NOT planning on restoring to a virtual machine, select "NovaBACKUP Image". - Backup Method:
Full-Only: This creates a full image backup of your entire system.
Full-Differential: This stores a full version and then backs up the changes since the last full version.
Full-Incremental: This stores a full version and then the changes since the last backup (full or incremental). - Image Type:
Used Sectors: This option only copies sectors used by the file system, thus reducing the image size and backup time.
Forensic:: This option is a bit-by-bit, sector-by-sector direct copy of a system, including all files, folders, and unallocated, free, and slack space.
Forensic direct: This option is important for digital forensic investigators because unallocated space that may contain deleted files or other residual data that could be used as direct evidence in an investigation is included in the type of image.
Recommendation: In the majority of the cases, you would select "Used Sectors" - After backup action:
Do nothing
Shut down computer
Restart computer - Additional Options:
Compress the backup: This reduces the file size of the backup and increases backup speed.
Verify the backup: This tests a backup for errors or information loss to ensure that data is valid.
Encryption settings: Encryption prevents unauthorized access to your private data.
- Backup Type
- Schedule your image backup by selecting the type of schedule and the date and time you want it to run for the first time.
- Enter the user who has access to the selected data to ensure that the backup works without errors even if you're logged out. Then click [Check Credentials].
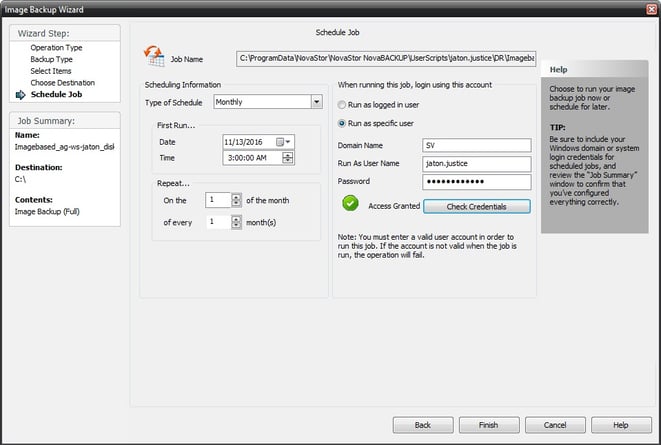
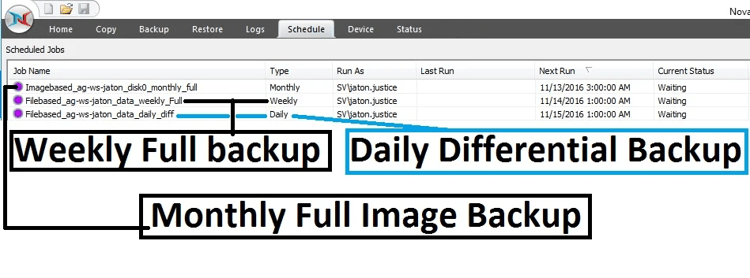
- Click [Finish]. The image backup schedule that you just created is now in the [Schedule] tab ready for its first image backup.
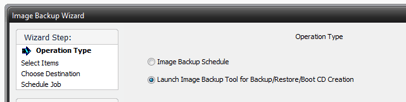
- From the Home tab, select [Image Backup].

- Click [Image Backup Creation Tool ...].
- A welcome page will open. From there, click the [Boot Disc] button.
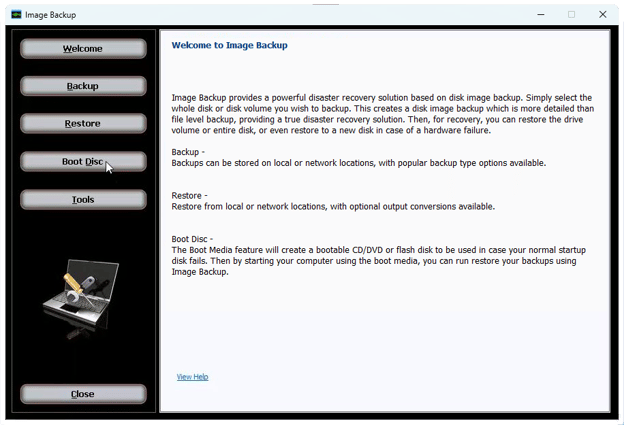
- Choose the type of boot media. Select [Simple] (recommended) then click the [Next] button.
Note: The [Advanced] option is for server operating systems that need to specify RAID controller drivers. Drivers can be loaded after booting the PC to the image boot media.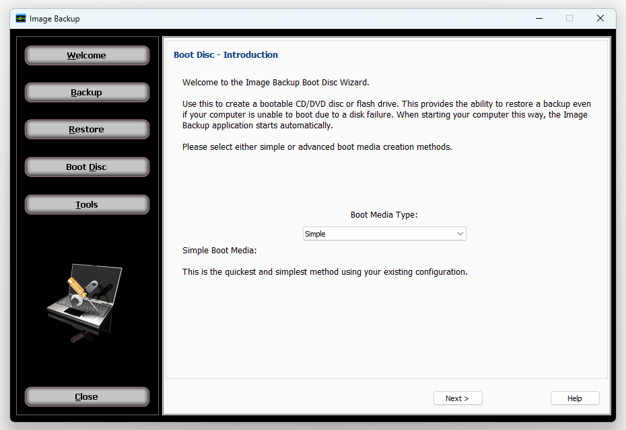
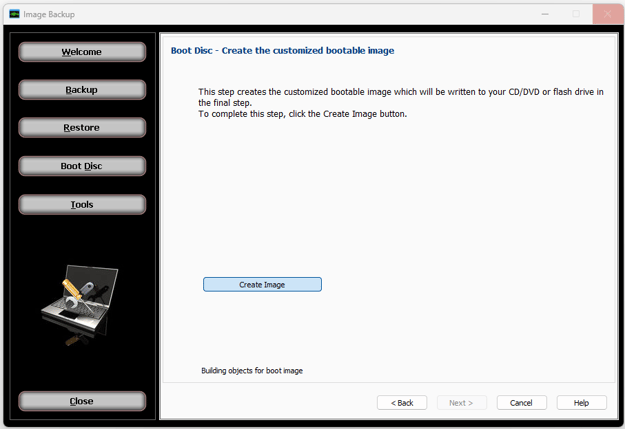
- Next, click the [Create Image] button to create a customized bootable image. Once you see that the process completed successfully, click the [Next] button to continue.
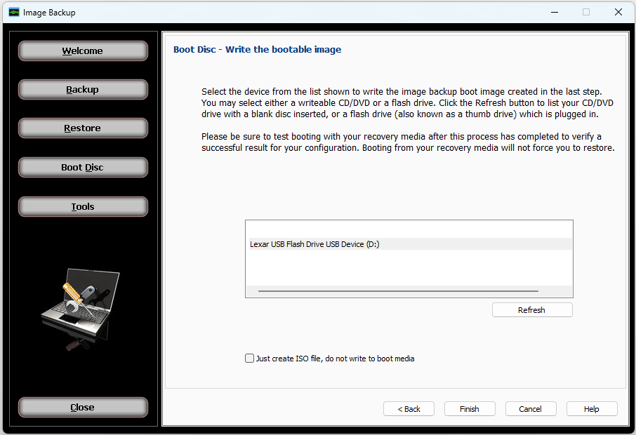
- Select the device you would like to write the boot disc image to. Click [Finish].
- Insert the boot disc CD/USB stick and start the computer.
- If the Boot Device Menu does not start automatically, you must know which F key on your PC's keyboard to press during the startup screen to enter your Boot Device Menu.
- Select your CD or USB drive as the first drive in your boot-up sequence. This will allow your system to access the DR Boot Disk media which you previously created, rather than attempting to boot from your hard disk.
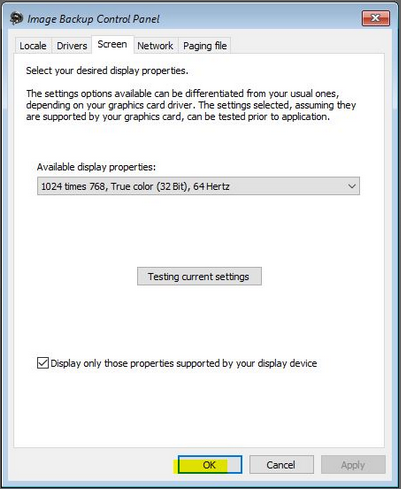
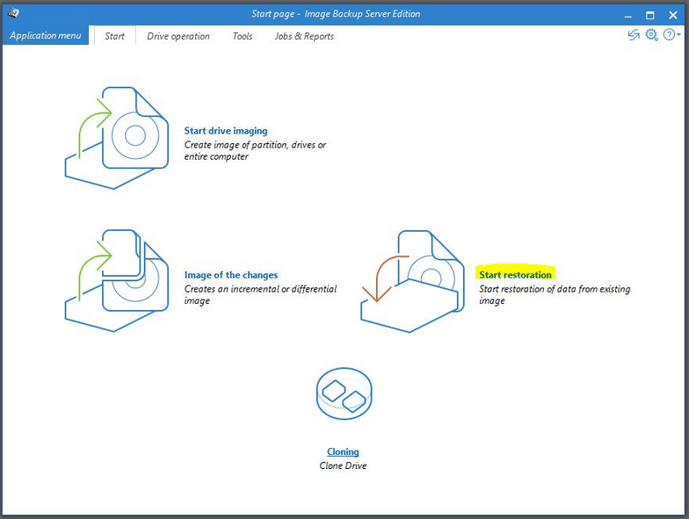
- Confirm your display and networking settings needed to start the environment using the Image Backup Control Panel dialog. Click [OK]
- Select [Start Restoration].
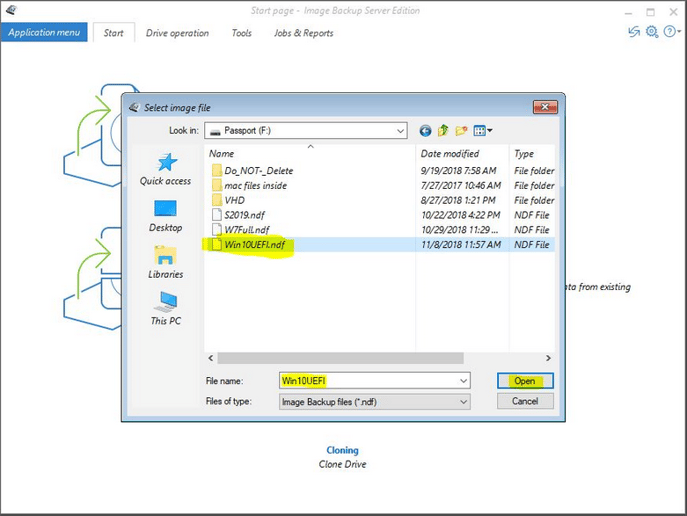
- Locate the Image Backup File (.NDF) to restore from. Click [Open].
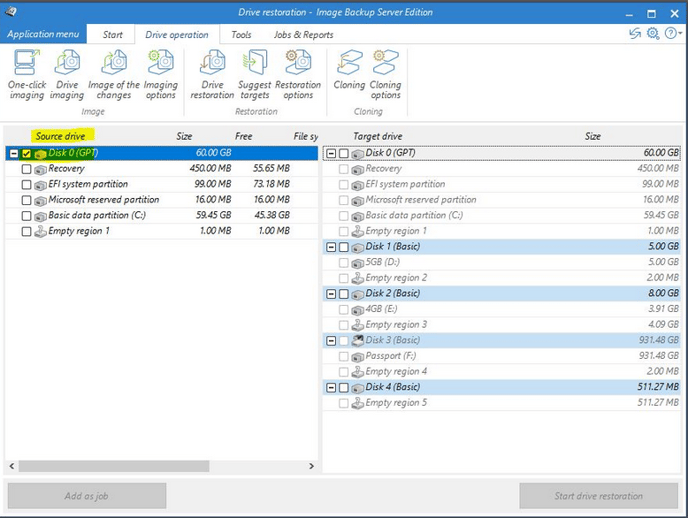
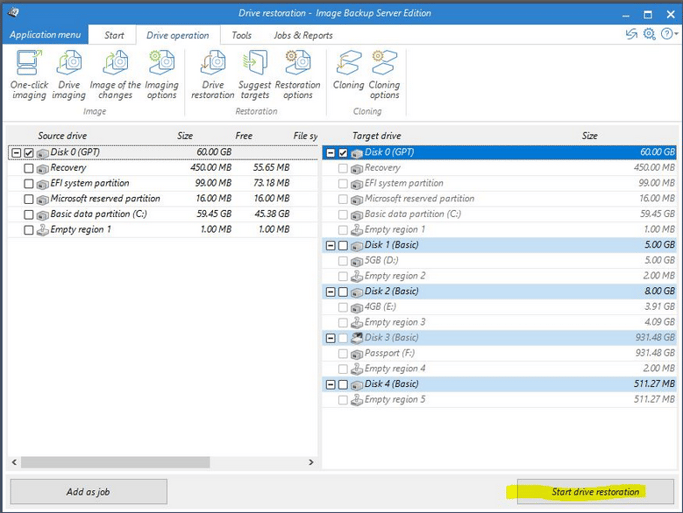
- Select the Source drive. The source when the Image Backup was created.
- Select the Target drive. This is the listing of the current partitions on the installed drives. This is what you are replacing using your Image Backup.
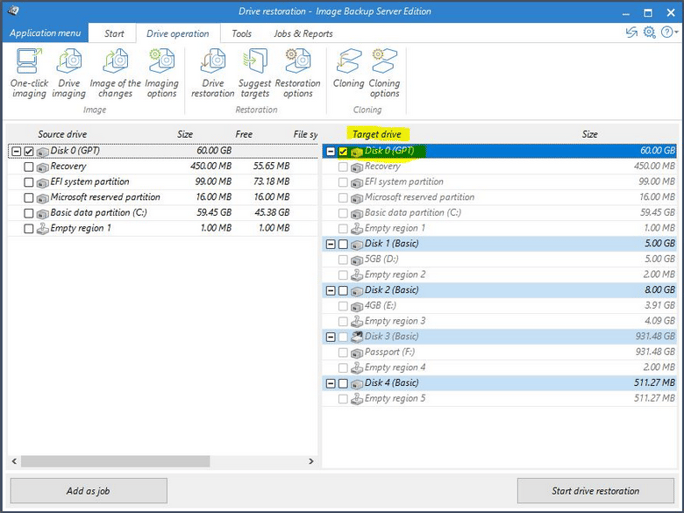
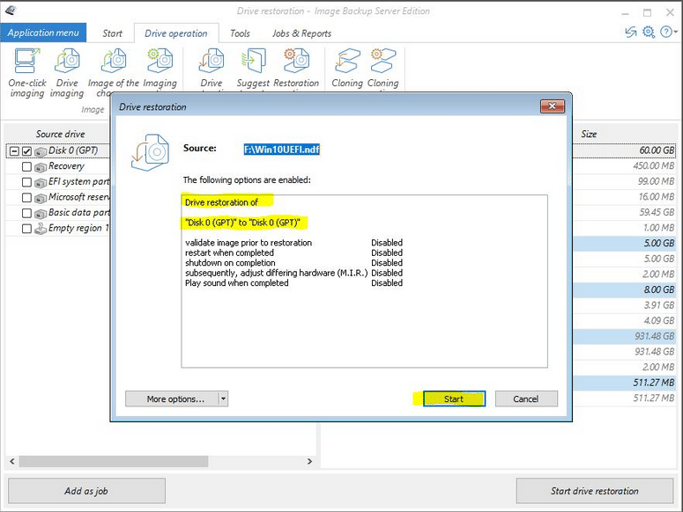
- Choose [Start drive restoration]. Note: A dialog box will appear to confirm settings.
- Confirm the settings. Click [Start].
- If data exists on the Target drive, a dialog will appear confirming you wish to "Completely delete the target drive". Choose [Delete] to replace the contents of the Target drive.
Note: This prompt will appear if you select any partition that already has data on it, to perform the restore you must delete the previous contents.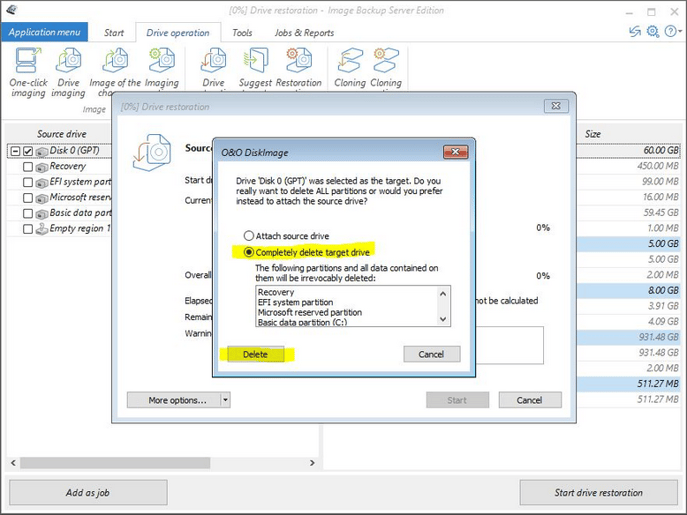
- The Restore process will start and display the progress.
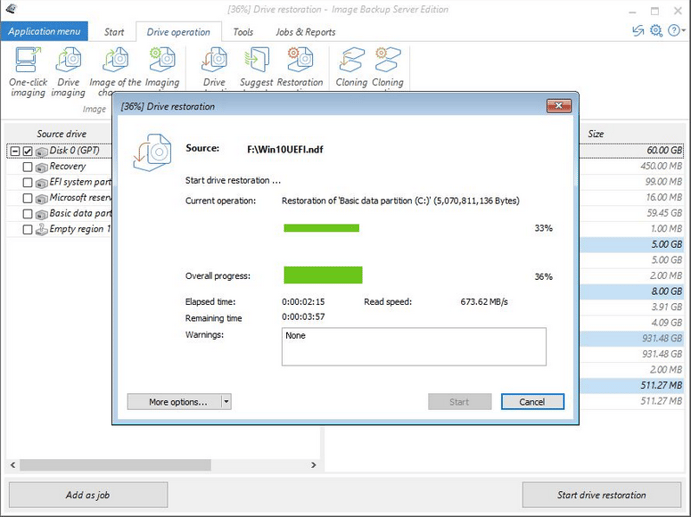
- A Dialog box will appear once the restore process has been completed. Click [Close] to finish.
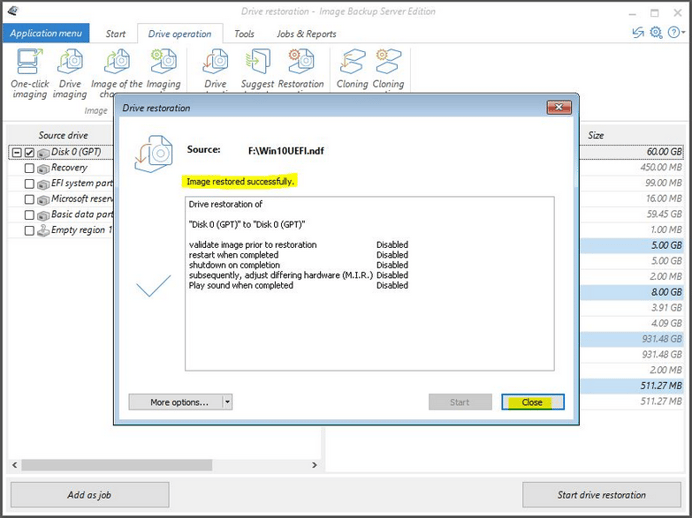
- Close the Drive restoration window by clicking the [X] in the top right corner. A dialog will appear asking if you wish to restart the computer, select [Yes].
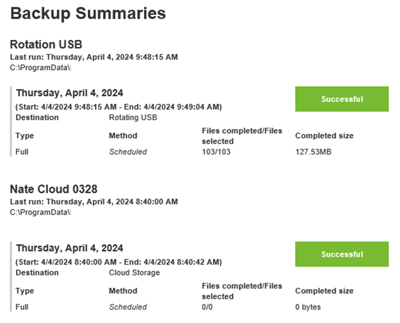
NovaBACKUP's reporting features allow you to create easy-to-understand email reports for more transparency in your data protection strategy.
The reports provide a very quick overview of the status of all jobs executed by NovaBACKUP during the selected reporting period.
To set up email logs, please follow the steps below:
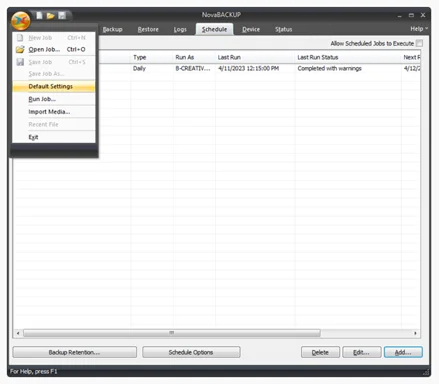
- From the home screen, click the NovaBACKUP icon in the top left. Select the [Default Settings] option.
- Switch to the [Notification] tab.
- Activate e-mail notification by checking the [Email] box and, then select the circumstances under which you would like to receive the logs by e-mail.
- Click on [Email settings] to store the email address or, if necessary, to define your own SMTP server.
- Go to the [Logs] tab from the main navigation at the top, then click the [Set up reports] button at the bottom.

- In the following window, use the tabs to select whether you want to receive the reports daily, weekly, or monthly, and enter the e-mail addresses of all people who should receive reports. You can enter multiple recipients separated by a semicolon.

Building and Running Your Managed Backup Service
The 3-2-1 Backup Rule: A Practical Guide for Small Businesses